Masterbuilt Electric Turkey Fryer Manual: A Comprehensive Guide
This manual provides detailed instructions for safe and effective use of your Masterbuilt electric turkey fryer‚ covering assembly‚ operation‚ and maintenance.
It emphasizes safety precautions‚ proper oil levels‚ and achieving perfectly fried results‚ referencing customer support at 1-800-489-1581.
Welcome to the world of effortless and delicious turkey frying! This Masterbuilt electric turkey fryer offers a safe‚ convenient alternative to traditional outdoor frying methods.
Designed for indoor use‚ it eliminates the risks associated with open flames and propane.
This manual will guide you through each step‚ from preparation and assembly to cooking and cleanup.
Remember‚ a maximum turkey size of 20lbs (9.07kgs) is recommended for optimal performance and safety.
Visit www.masterbuilt.com for additional resources‚ videos‚ and recipes to enhance your frying experience.
Understanding Your Fryer: Model Numbers & Variations
Masterbuilt offers several variations of electric turkey fryers‚ including models from the Butterball line. Identifying your specific model number (e.g.‚ 20100809) is crucial for accessing the correct parts and support.
Variations may differ in capacity‚ features‚ and included accessories.
Refer to the product packaging or the unit itself to locate the model number.
Online resources‚ like the Masterbuilt website‚ often provide detailed specifications and compatibility information for each model‚ ensuring a perfect fry every time.
Safety First: Important Safeguards & Warnings
Prioritize safety when operating your Masterbuilt electric turkey fryer. Always read all instructions before use.
A short power cord minimizes entanglement risks. Never exceed the maximum turkey size of 20lbs (9.07kgs).
Avoid outdoor use and ensure a stable‚ level surface.
Do not operate the fryer unattended.
Keep children and pets away during operation.
In case of fire‚ do not use water; instead‚ smother with a lid or baking soda. Contact Masterbuilt at 1-800-489-1581 for assistance.
Maximum Turkey Size & Weight Limits (20lbs/9.07kgs)
Strictly adhere to the 20lbs (9.07kgs) maximum turkey size and weight limit for safe operation of your Masterbuilt electric fryer.
Exceeding this limit can cause oil overflow‚ posing a significant burn hazard and potentially damaging the unit.
Smaller turkeys will cook more evenly and safely.
Do not attempt to fry a larger bird‚ even partially‚ as this compromises safety features.
Always verify the turkey’s weight before frying to ensure compliance with these critical guidelines.
Cord Length & Safety Considerations
A shorter cord is intentionally provided to minimize risks of entanglement and tripping during operation of the Masterbuilt electric turkey fryer.
Never use an extension cord‚ as this negates safety features and increases the potential for electrical hazards.
Ensure the fryer is placed on a stable‚ level surface‚ away from flammable materials.
Keep the cord away from hot surfaces and avoid any contact with water.
Regularly inspect the cord for damage before each use‚ and discontinue if frayed.

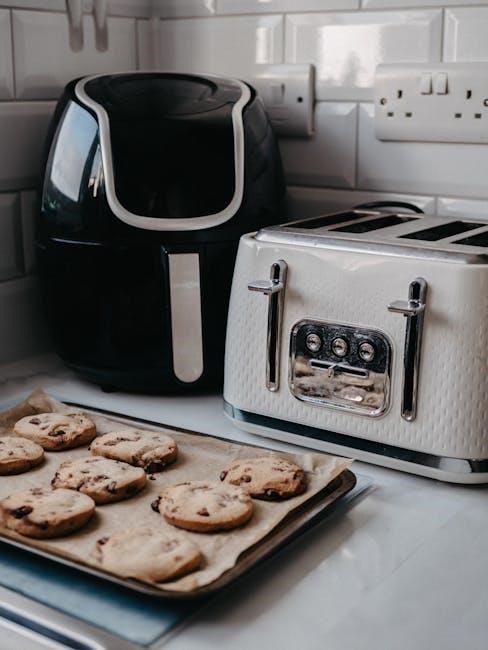
Assembly & Component Identification
Before first use‚ carefully unpack and identify all components of your Masterbuilt electric turkey fryer.
These include the fryer pot‚ control panel‚ lid‚ basket‚ and power cord.
Refer to the included parts list to ensure everything is present.
Proper assembly is crucial for safe operation; ensure all parts are securely connected.
For assistance with assembly or missing parts‚ contact Masterbuilt Customer Service at 1-800-489-1581. Visit www.masterbuilt.com for visual guides.
Identifying All Parts & Accessories
Your Masterbuilt electric turkey fryer includes several key components. These are the fryer pot itself‚ the precise temperature control panel‚ a safety lid for covering the hot oil‚ a convenient frying basket for turkey insertion and removal‚ and a detachable power cord. Ensure you have all listed items before proceeding. Accessories may vary by model‚ but typically include a thermometer and potentially a lifting hook. Refer to your model’s specific parts diagram for accurate identification.
Proper Assembly Instructions
Begin by placing the fryer base on a stable‚ level surface. Carefully insert the fryer pot into the base‚ ensuring it sits securely. Attach the temperature control panel‚ aligning it with the designated slots and securing it firmly. Connect the power cord to the fryer and then to a grounded electrical outlet. Before first use‚ wipe down all components with a damp cloth. Do not operate the fryer without proper assembly‚ and always consult the included diagrams for visual guidance.
Preparing the Turkey for Frying
Thorough preparation is crucial for a safe and delicious fried turkey. Ensure the turkey is completely thawed – allow ample time‚ calculating roughly 24 hours per 5 pounds. Remove giblets and neck from the cavities. Pat the turkey completely dry‚ inside and out‚ using paper towels; this minimizes oil splatter. Consider brining or seasoning for enhanced flavor‚ but ensure the cavity is dry before frying. A dry turkey is a safe turkey!
Thawing the Turkey Completely
Complete thawing is paramount for safety and even cooking. The recommended method is refrigerator thawing‚ allowing approximately 24 hours for every 5 pounds of turkey. Ensure the turkey is fully thawed before frying; ice crystals can cause dangerous oil splattering. Never thaw at room temperature. A fully thawed turkey will cook more evenly and reduce frying time‚ resulting in a juicy and flavorful bird. Verify no ice remains in the joints.
Drying the Turkey: Inside and Out
Thoroughly drying the turkey is crucial for preventing dangerous oil splatter. Use paper towels to meticulously pat down the skin‚ both inside and outside the cavity. Moisture reacts violently with hot oil‚ creating a hazardous situation. Remove any remaining giblets or neck from the cavity. Ensure the turkey is as dry as possible before lowering it into the hot oil. This step significantly enhances safety and promotes crispy skin.
Seasoning & Brining Recommendations
Enhance your turkey’s flavor with brining or seasoning. Brining involves submerging the turkey in a saltwater solution for 12-24 hours‚ resulting in a juicier‚ more flavorful bird. Alternatively‚ generously season the turkey inside and out with your favorite herbs‚ spices‚ and rubs. Consider injecting marinades for deeper flavor penetration. Remember to pat the turkey dry after brining or seasoning to ensure safe frying and crispy skin.

Oil Selection & Quantity
Choosing the right oil is crucial for safety and flavor. Recommended oils include peanut‚ vegetable‚ and canola oil‚ each offering a high smoke point suitable for deep frying. Never use olive oil. Determining the correct oil quantity requires a water displacement test: place the turkey in the fryer basket‚ cover with oil‚ and remove the turkey. Measure the remaining oil – this is the amount needed. Ensure the oil level remains within the fryer’s “min” and “max” fill lines.
Recommended Oil Types (Peanut‚ Vegetable‚ Canola)
Peanut oil is a popular choice due to its high smoke point and minimal flavor impact‚ resulting in a crispy turkey. Vegetable and canola oils are excellent alternatives‚ offering similar high smoke points and affordability. Avoid oils with low smoke points‚ like olive oil‚ as they can degrade and create unsafe conditions. Always ensure the oil is fresh and clean before each use‚ discarding any oil that appears cloudy or has been previously used for other frying purposes.
Determining the Correct Oil Level
Proper oil level is crucial for safety and even cooking. Place the turkey in the fryer basket without the turkey itself‚ then fill with water until the turkey is fully submerged. Remove the turkey and water‚ marking the water line – this indicates the required oil level. Never exceed the maximum fill line indicated on the fryer. Insufficient oil poses a fire hazard‚ while excessive oil can overflow during operation‚ creating a dangerous situation.
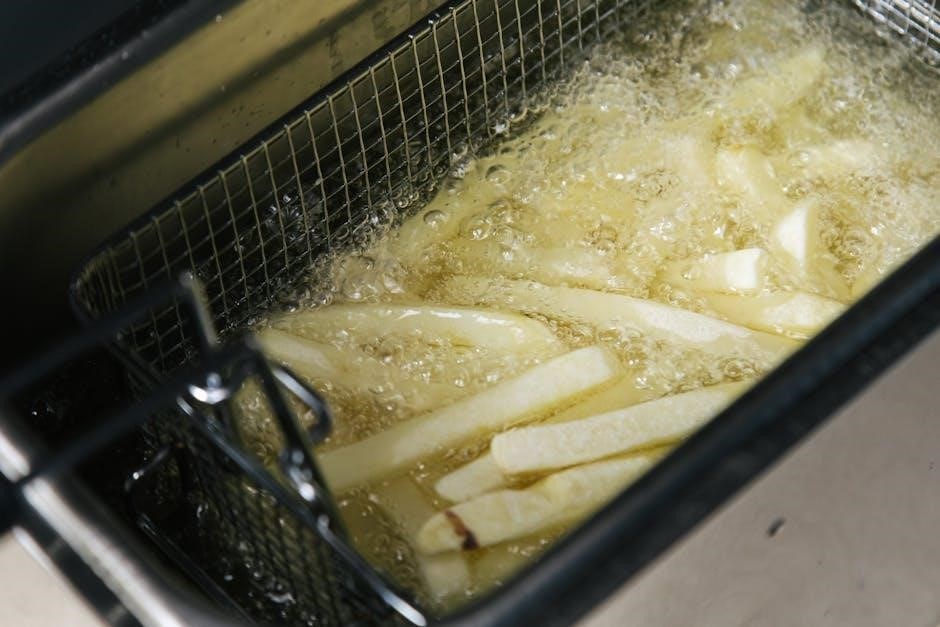
Operating Instructions: Step-by-Step Guide
Begin by ensuring the fryer is on a stable‚ level surface. Power on the unit and set the desired temperature‚ typically around 350°F (177°C). Allow the oil to preheat completely – this may take some time. Carefully and slowly lower the thoroughly dried and seasoned turkey into the hot oil using the provided lifting hook. Maintain consistent temperature throughout the frying process‚ monitoring closely for optimal results and safety.
Powering On & Setting the Temperature
Before powering on‚ confirm the fryer is correctly assembled and filled with the appropriate oil level. Plug the unit into a grounded outlet. The control panel allows you to set the desired frying temperature‚ generally around 350°F (177°C). Allow ample time for the oil to reach and maintain this temperature before introducing the turkey.
Regularly monitor the temperature gauge to ensure consistent heating throughout the frying process.
Lowering the Turkey into the Oil
Exercise extreme caution when lowering the turkey into the hot oil. Utilize the lifting hook and slowly‚ carefully descend the turkey into the oil‚ ensuring complete submersion. Avoid splashing‚ as hot oil can cause severe burns. Maintain a firm grip on the lifting hook throughout the process.
Never attempt to lower the turkey by hand. Ensure the turkey is fully submerged before releasing the hook‚ and monitor closely for any issues.
Frying Time & Temperature Guidelines
Maintain a consistent oil temperature of 325°F (163°C) throughout the frying process. Generally‚ allow approximately 3-4 minutes of frying time per pound of turkey. Use a meat thermometer to verify internal temperature‚ aiming for 165°F (74°C) in the thickest part of the thigh.
Adjust temperature as needed to maintain consistency. Do not overcrowd the fryer‚ and always monitor the process closely for optimal results.
Monitoring the Frying Process
Consistent temperature control is crucial for safe and delicious results. Regularly check the oil temperature using the fryer’s built-in thermometer‚ adjusting the settings as needed to maintain 325°F (163°C). Frequently monitor the turkey’s progress‚ ensuring even cooking.
Utilize a meat thermometer to verify the internal temperature reaches 165°F (74°C) in the thigh. Careful observation prevents overcooking or undercooking.
Temperature Control & Adjustment
Maintaining a consistent oil temperature of 325°F (163°C) is vital for optimal frying. Use the control knob to precisely adjust the heat‚ observing the thermometer for accurate readings. Fluctuations are normal; make small adjustments to compensate.
Avoid drastic changes‚ as they can affect cooking time and quality; Regularly monitor and fine-tune the temperature throughout the frying process for a perfectly cooked turkey.
Checking for Doneness (Internal Temperature)
Ensure the turkey reaches a safe internal temperature of 165°F (74°C)‚ measured with a meat thermometer inserted into the thickest part of the thigh‚ avoiding the bone. Check multiple spots to confirm even cooking.
A properly cooked turkey will have juicy‚ flavorful meat and crispy skin. Do not rely solely on frying time; internal temperature is the definitive indicator of doneness for food safety and quality.
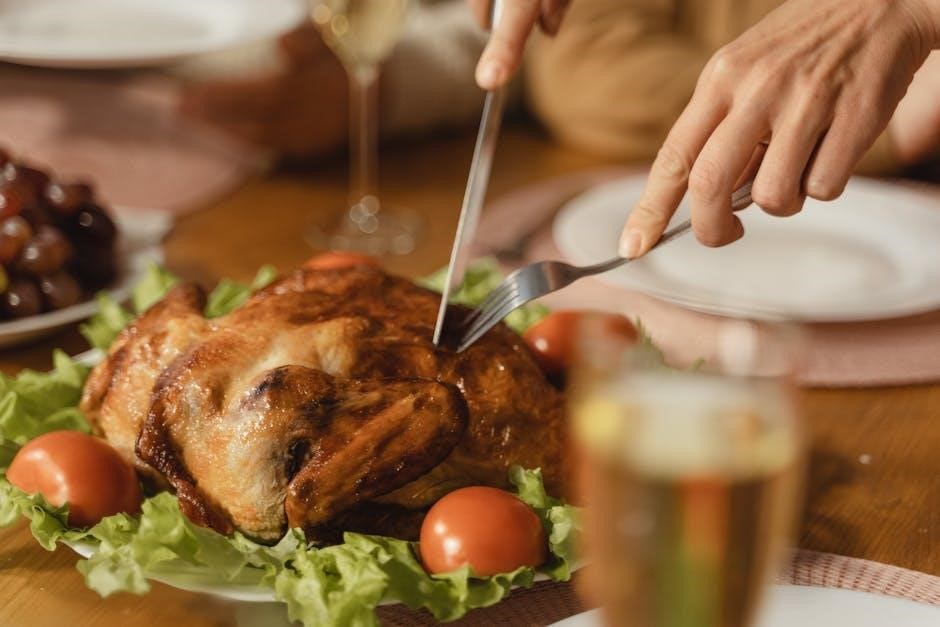
Removing the Turkey & Cooling
Carefully lift the turkey from the hot oil using the provided hook or sturdy tongs‚ allowing excess oil to drain back into the fryer. Place the turkey on a wire rack set over a baking sheet to prevent sogginess. Allow the turkey to cool and rest for at least 20-30 minutes before carving. This resting period allows juices to redistribute‚ resulting in a more tender and flavorful final product.
Safe Removal Techniques
Always use the provided lifting hook or heavy-duty tongs to carefully remove the turkey from the hot oil‚ avoiding splashing. Never attempt to lift the turkey with your hands or use inadequate tools. Slowly and steadily raise the turkey‚ allowing excess oil to drain completely back into the fryer. Maintain a safe distance and be mindful of the hot oil and steam. Ensure a stable and secure grip throughout the removal process to prevent accidents.
Cooling & Resting the Turkey
After removal‚ place the fried turkey on a wire rack set over a baking sheet to allow for proper cooling and drainage. Allow the turkey to rest for at least 20-30 minutes before carving‚ enabling the juices to redistribute throughout the meat. This resting period is crucial for a more tender and flavorful result. Avoid covering the turkey tightly during cooling‚ as this can lead to soggy skin.
Cleaning & Maintenance
Proper cleaning ensures longevity and safe operation of your Masterbuilt fryer. Always unplug and cool the unit completely before cleaning. Dispose of used oil responsibly – never pour it down the drain. Carefully detach and clean all removable components‚ like the pot and basket‚ with warm‚ soapy water. Wipe the exterior with a damp cloth. Store the fryer in a cool‚ dry place‚ ensuring all parts are thoroughly dry before storage.
Disposing of Used Oil Properly

Used frying oil requires careful disposal to protect the environment. Never pour oil down drains‚ as it can cause significant plumbing and environmental issues. Allow the oil to cool completely‚ then strain it to remove food particles. Pour the cooled oil into a sealed container‚ like the original oil jug or a plastic bottle. Check with your local waste management for designated oil recycling or disposal locations.
Cleaning the Fryer Components
Always unplug the fryer and allow it to cool completely before cleaning. Remove the pot and basket‚ washing them with warm‚ soapy water. Avoid abrasive cleaners that could damage the non-stick coating. Wipe down the exterior of the fryer with a damp cloth. Never immerse the electrical base in water. Ensure all parts are thoroughly dry before reassembling and storing. Regular cleaning maintains performance and longevity.
Storage Instructions
Before storing‚ ensure the fryer is completely cool‚ clean‚ and dry. Store the unit in a cool‚ dry place‚ away from direct sunlight and extreme temperatures. Keep the power cord neatly coiled and secured to prevent damage. It’s best to store the pot and basket inside the fryer unit to keep all components together. Avoid stacking heavy items on top of the fryer during storage to prevent potential damage.
Troubleshooting Common Issues
If the fryer isn’t heating‚ check the power cord and outlet. Ensure the unit is properly assembled and the temperature is set correctly. For oil temperature fluctuations‚ avoid outdoor use in windy conditions or excessive drafts. Verify the turkey isn’t too large‚ exceeding the 20lb limit. If issues persist‚ do not attempt self-repair; contact Masterbuilt Customer Service at 1-800-489-1581 for assistance and potential solutions.
Fryer Not Heating Up
If your Masterbuilt fryer fails to heat‚ first verify the power cord is securely plugged into a functioning outlet. Confirm the unit is correctly assembled‚ as improper assembly can prevent operation. Double-check the temperature setting; it must be set above the current oil temperature. Do not operate with a damaged cord. If these steps don’t resolve the issue‚ avoid attempting repairs yourself and contact Masterbuilt Customer Service at 1-800-489-1581 for expert guidance.
Oil Temperature Fluctuations
Minor oil temperature fluctuations are normal during turkey frying‚ especially when introducing the cold turkey. However‚ significant or erratic changes require attention. Ensure the fryer is on a level surface and sheltered from drafts. Avoid overcrowding the oil‚ as this drastically lowers the temperature. Verify the correct oil quantity is used‚ as insufficient oil impacts stability. If fluctuations persist‚ discontinue use and contact Masterbuilt Customer Service at 1-800-489-1581 for assistance.
Frequently Asked Questions (FAQ)
Can I fry a frozen turkey? Absolutely not! The turkey must be completely thawed to prevent dangerous oil splatter and uneven cooking. What if my turkey is over 20lbs? Do not attempt to fry a turkey exceeding the 20lb (9.07kg) maximum weight limit. This poses a significant safety risk. For further assistance or questions‚ visit www.masterbuilt.com or contact Masterbuilt Customer Service at 1-800-489-1581. Always prioritize safety when operating your fryer.
Can I Fry a Frozen Turkey?
A resounding no! Attempting to fry a frozen turkey is extremely dangerous and strictly prohibited. The rapid temperature difference between the frozen turkey and the hot oil will cause violent splattering‚ potentially leading to severe burns and a fire hazard. Ensure your turkey is completely thawed before frying. Thorough thawing is crucial for safety and even cooking. Refer to the manual for proper thawing guidelines and contact Masterbuilt at 1-800-489-1581 with any concerns.
What if My Turkey is Over 20lbs?
Do not attempt to fry a turkey exceeding the 20lbs (9.07kgs) maximum weight limit. This fryer is specifically designed and tested for turkeys within this size range. Exceeding this limit poses significant safety risks‚ including oil overflow‚ instability‚ and potential fire hazards. Using a larger turkey could damage the unit and void your warranty. For larger birds‚ consider alternative cooking methods. Contact Masterbuilt customer service at 1-800-489-1581 for guidance.
Recipes & Cooking Ideas
Beyond the classic fried turkey‚ explore diverse flavor profiles! Marinades incorporating herbs‚ spices‚ and citrus zest elevate the taste. Try a Cajun injection for spicy goodness or a brown sugar-bourbon blend for sweetness. Visit www.masterbuilt.com for delicious recipes and inspiration. Experiment with dry rubs before frying for enhanced crust flavor. Remember to maintain safe internal temperatures for a perfectly cooked and flavorful turkey‚ ensuring a memorable feast for all.
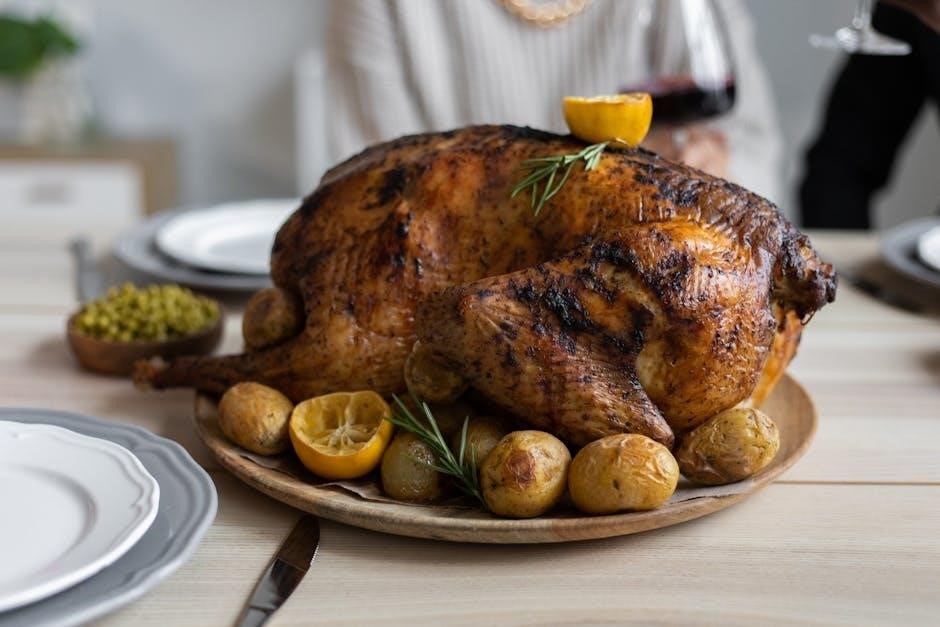
Classic Fried Turkey Recipe
Begin with a thoroughly thawed and dried turkey (under 20lbs/9.07kgs). Brine overnight for optimal moisture. Pat completely dry inside and out. Season generously with salt‚ pepper‚ garlic powder‚ and paprika. Carefully lower the turkey into the preheated oil (peanut‚ vegetable‚ or canola) maintaining a safe distance. Fry for approximately 3-4 minutes per pound‚ monitoring the internal temperature. Rest for 20 minutes before carving‚ ensuring a juicy and flavorful classic fried turkey.

Flavor Variations & Marinades
Elevate your fried turkey with diverse marinades! Consider a Cajun spice rub with cayenne pepper‚ paprika‚ and garlic. A citrus herb marinade featuring lemon‚ rosemary‚ and thyme adds brightness. For a sweeter profile‚ try a maple-bourbon glaze. Ensure marinades are thoroughly patted dry before frying to prevent oil splatter. Experiment with injecting marinades directly into the turkey for deeper flavor penetration‚ always maintaining safe handling practices and temperature control.
Warranty Information & Customer Support
Masterbuilt stands behind its products with a comprehensive warranty‚ covering manufacturing defects for a specified period. Retain your proof of purchase for warranty claims. For assembly assistance‚ missing parts‚ or damaged components‚ contact Masterbuilt Customer Service directly at 1-800-489-1581. Detailed warranty information and coverage specifics are available on the Masterbuilt website (www.masterbuilt.com). Promptly address any issues to ensure optimal fryer performance and longevity.
Masterbuilt Customer Service Contact (1-800-489-1581)
For immediate assistance with your Masterbuilt electric turkey fryer‚ reach out to their dedicated customer service team at 1-800-489-1581. This is the primary contact for assembly questions‚ missing or damaged parts‚ and troubleshooting. Representatives are available to guide you through operation‚ safety concerns‚ and warranty claims. Keep your model number handy when calling for efficient support. Masterbuilt prioritizes customer satisfaction and aims to resolve issues quickly and effectively.
Warranty Details & Coverage
Masterbuilt stands behind its electric turkey fryers with a comprehensive warranty‚ protecting against manufacturing defects. Coverage typically includes the fryer unit itself‚ but may exclude wear-and-tear items. The warranty period varies by model‚ so retain your purchase receipt for verification. Damage resulting from misuse‚ improper assembly‚ or failure to follow safety guidelines is not covered. For specific details regarding your fryer’s warranty‚ visit www.masterbuilt.com or contact customer service at 1-800-489-1581.
Resources & Further Information
For expanded support and cooking inspiration‚ Masterbuilt offers a wealth of online resources. Visit their official website at www.masterbuilt.com to access detailed product information‚ downloadable manuals‚ and a library of delicious recipes. Explore online video tutorials demonstrating proper fryer operation and safety procedures. YouTube channels‚ like “Cooking with MZ Magic‚” provide step-by-step guidance. Should you require assistance‚ Masterbuilt’s customer service team is available at 1-800-489-1581.
Masterbuilt Website (www.masterbuilt.com)
The official Masterbuilt website serves as a central hub for all fryer-related information. Users can download the complete operation manual and safety instructions for their specific model‚ ensuring proper usage. Discover a diverse collection of recipes‚ ranging from classic fried turkey to innovative flavor variations. Explore helpful video tutorials demonstrating assembly‚ operation‚ and cleaning procedures.
Access frequently asked questions and contact customer support directly through the website for prompt assistance.
Online Video Tutorials & Guides
Numerous online video tutorials offer visual guidance for using your Masterbuilt electric turkey fryer. These resources demonstrate step-by-step preparation‚ including thawing‚ drying‚ and seasoning the turkey. Viewers can learn safe lowering techniques and monitor the frying process effectively.
Tutorials also cover proper cleaning and maintenance procedures‚ ensuring longevity. Channels like Cooking with Mz Magic provide detailed demonstrations for achieving perfectly fried results‚ enhancing user confidence.